
Classes are taught by members in the club's own studios, and members enroll online. Every class and lab charges a building-use fee of $5 for each scheduled hour, which you can pay by card or with Arlie Bucks at one Buck an hour (a few classes, such as Intro to Silversmithing, take card only). Materials, kits and tools are paid by card when you sign up; a few extras are bought from the instructor in class. Life members do not pay the building fee.
Step 1: Browse the class list
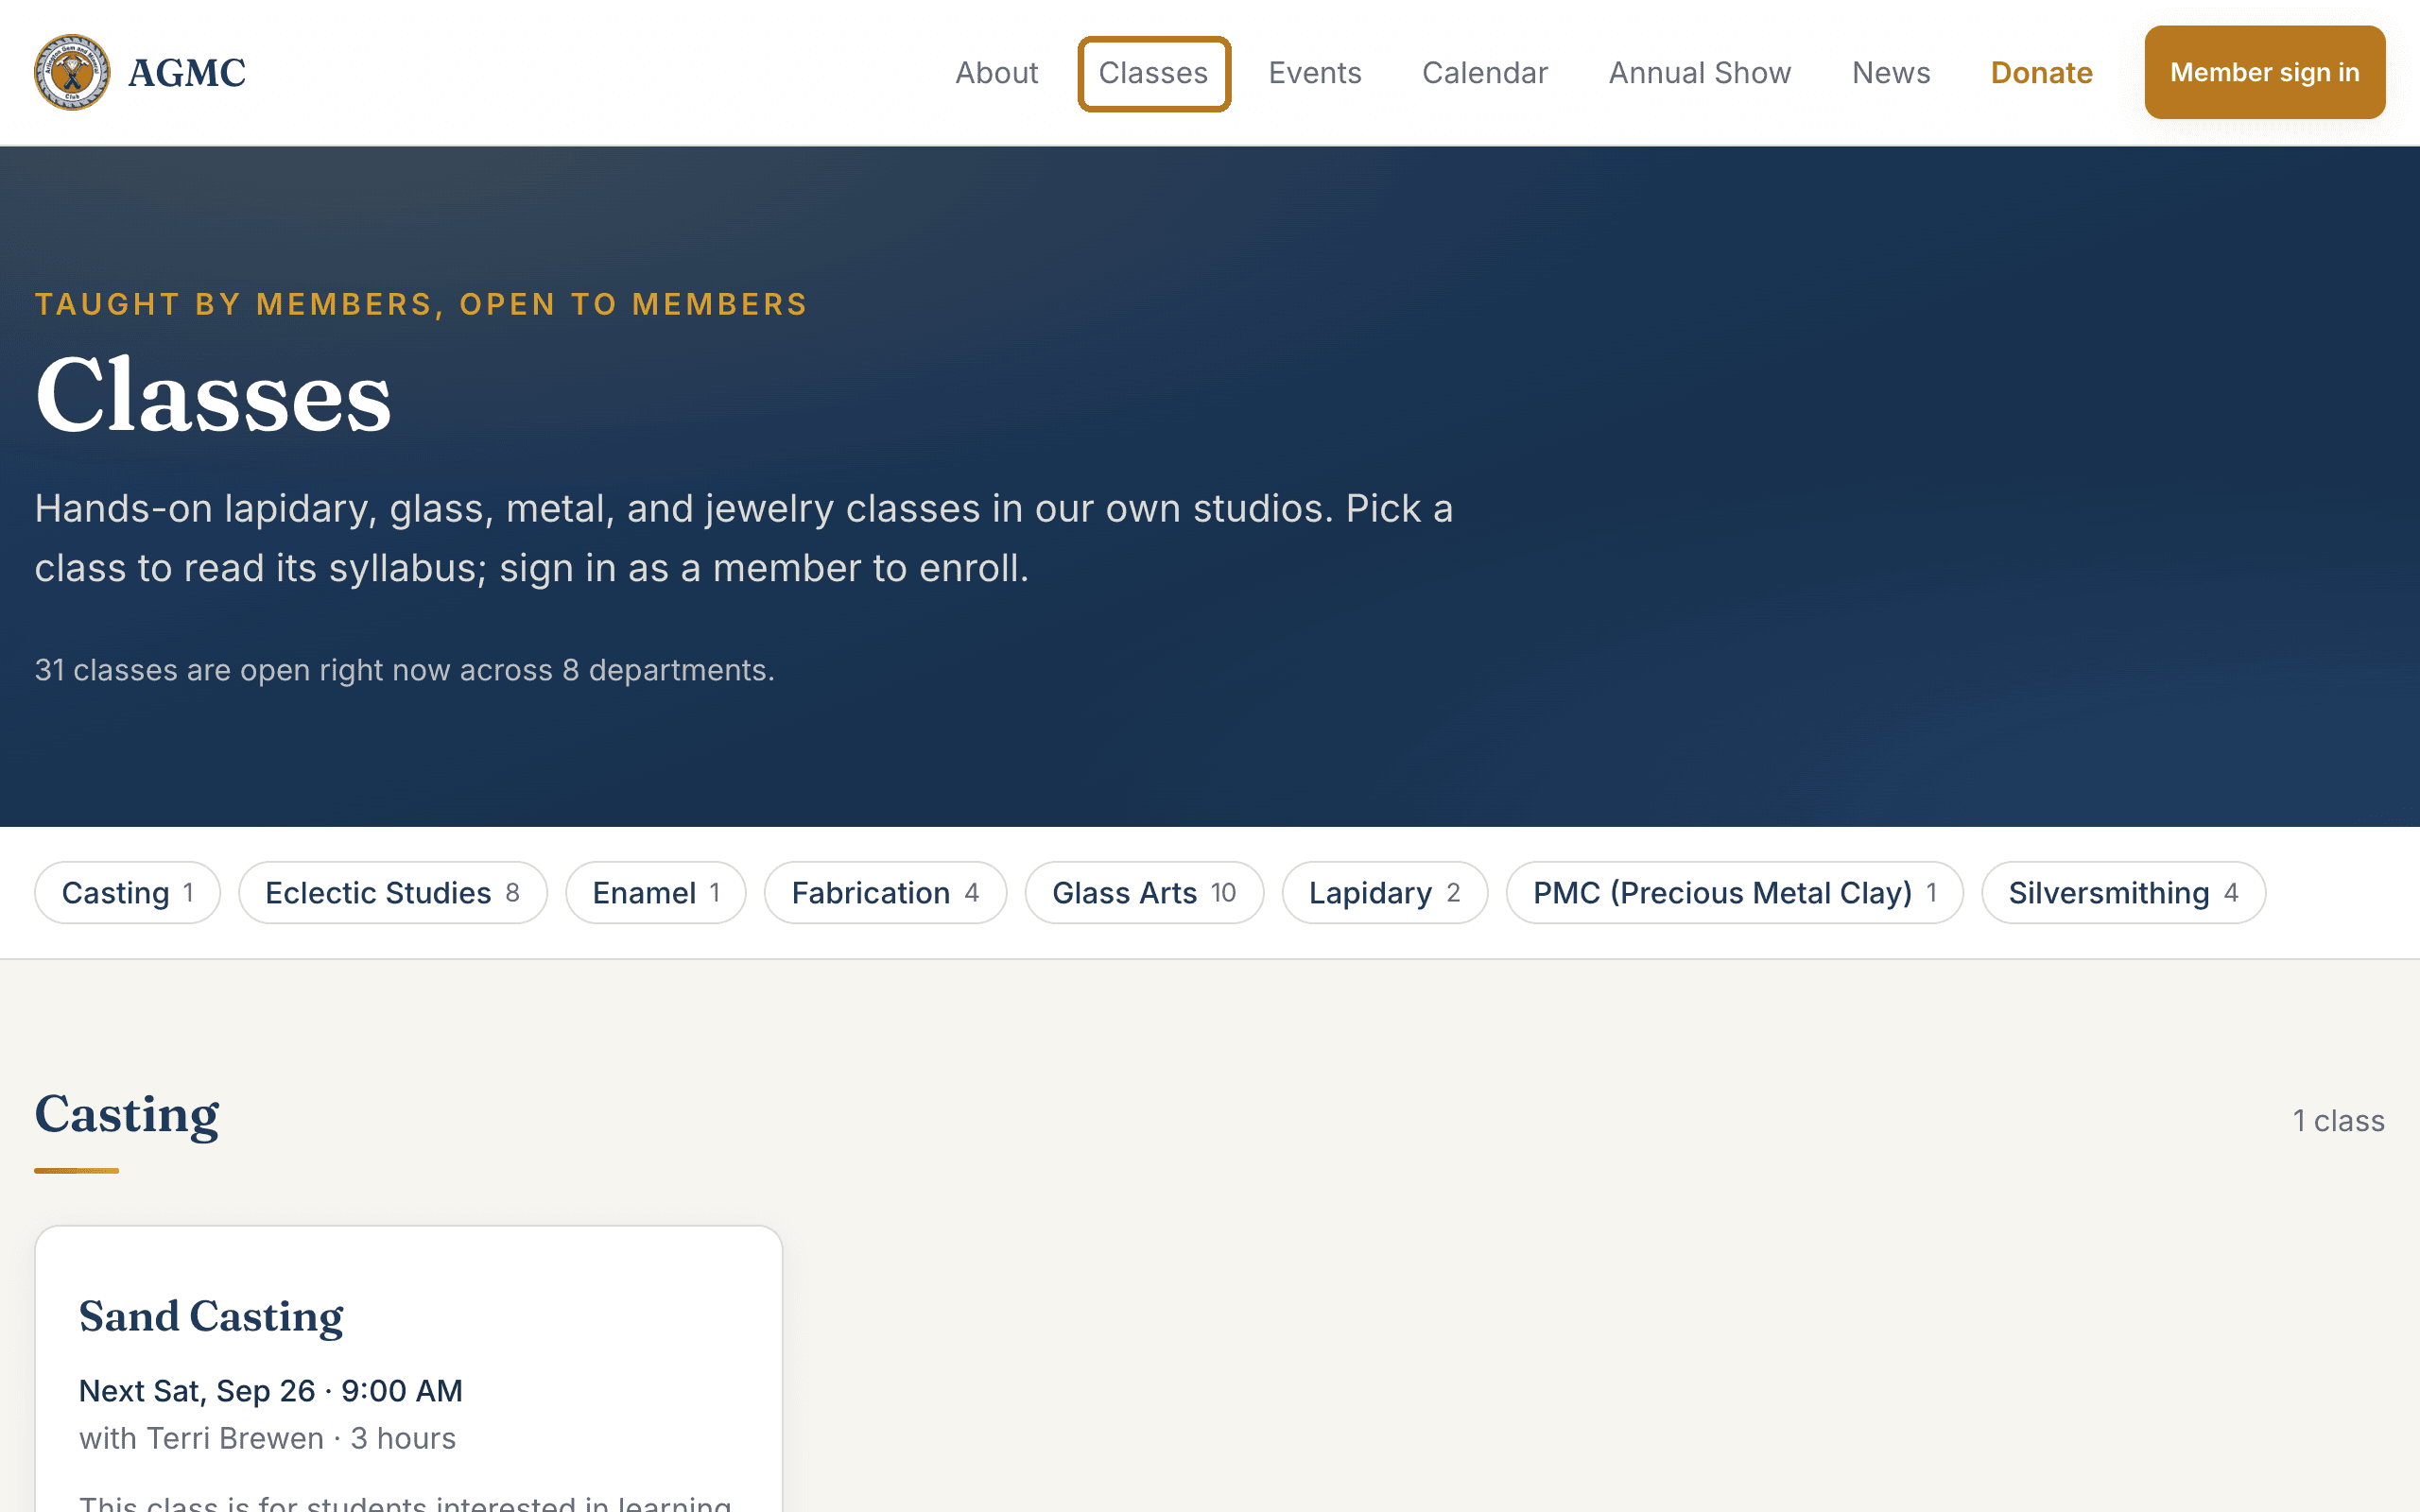
Select Classes in the top menu of the club site. Every class with open dates is listed, grouped by department, with its next date, instructor, length and price. The department chips near the top jump you to one department.
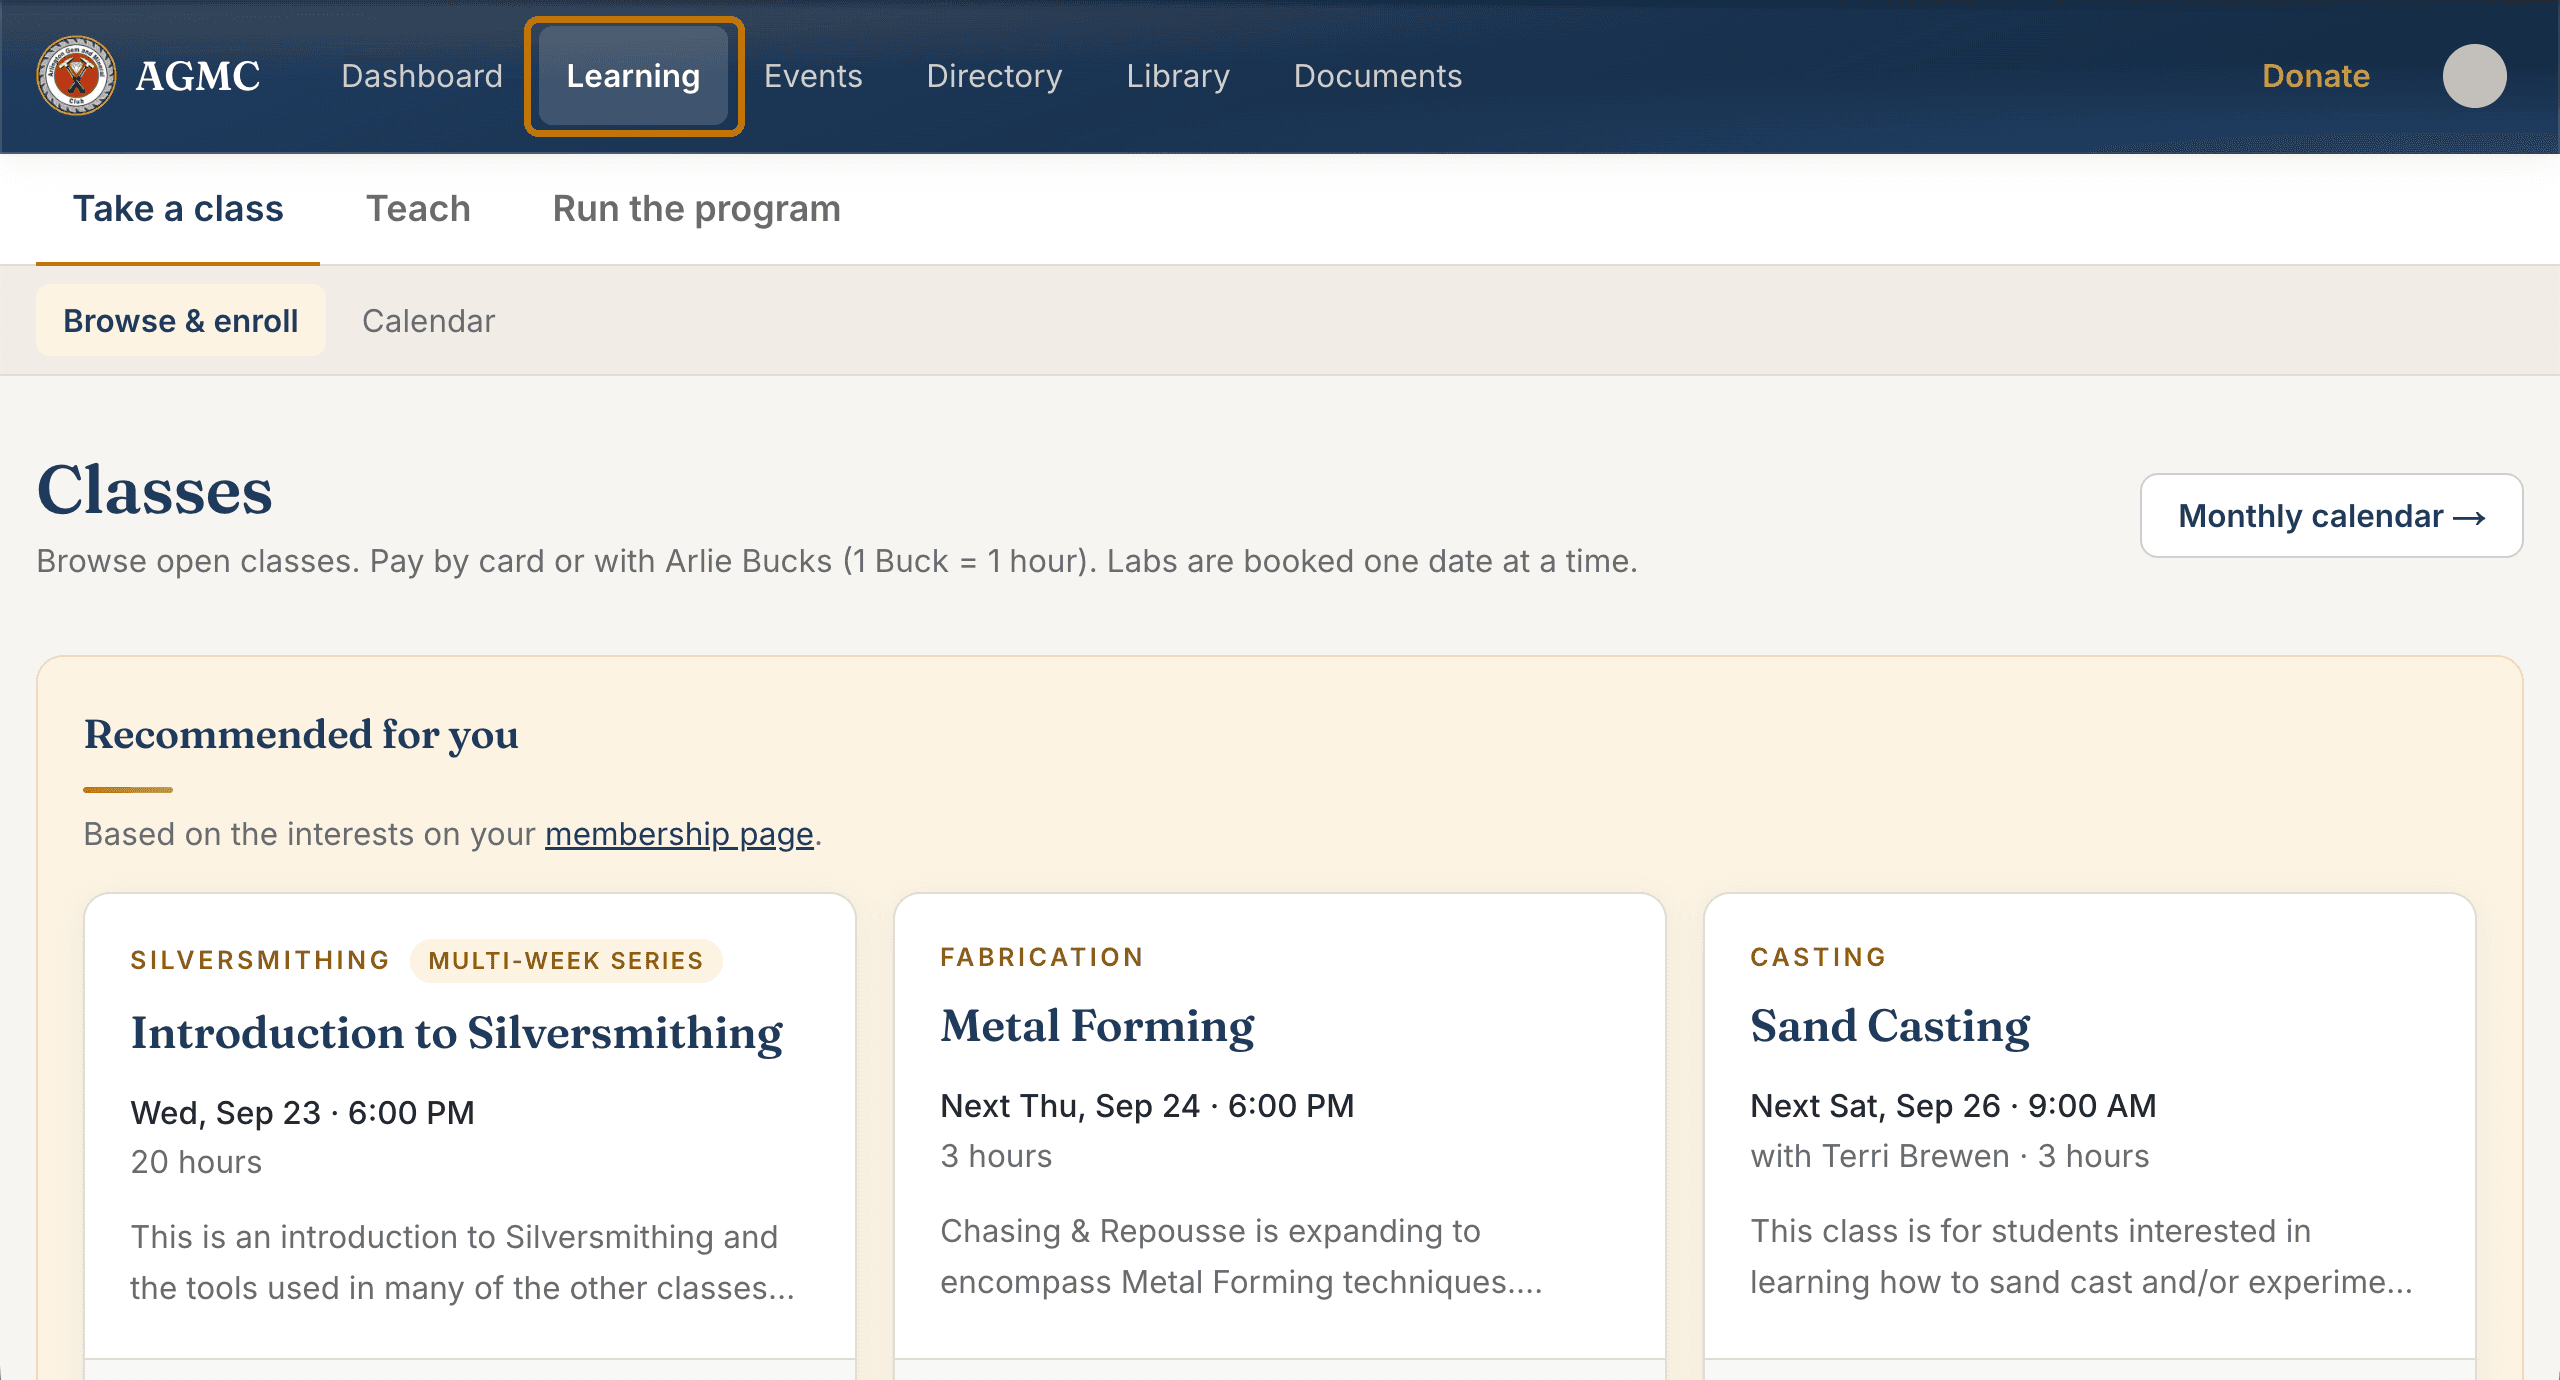
Signed in, Learning in the top bar, then Classes, shows the same list plus a Recommended for you row based on the interests on your Membership page.
Step 2: Open a class and read about it
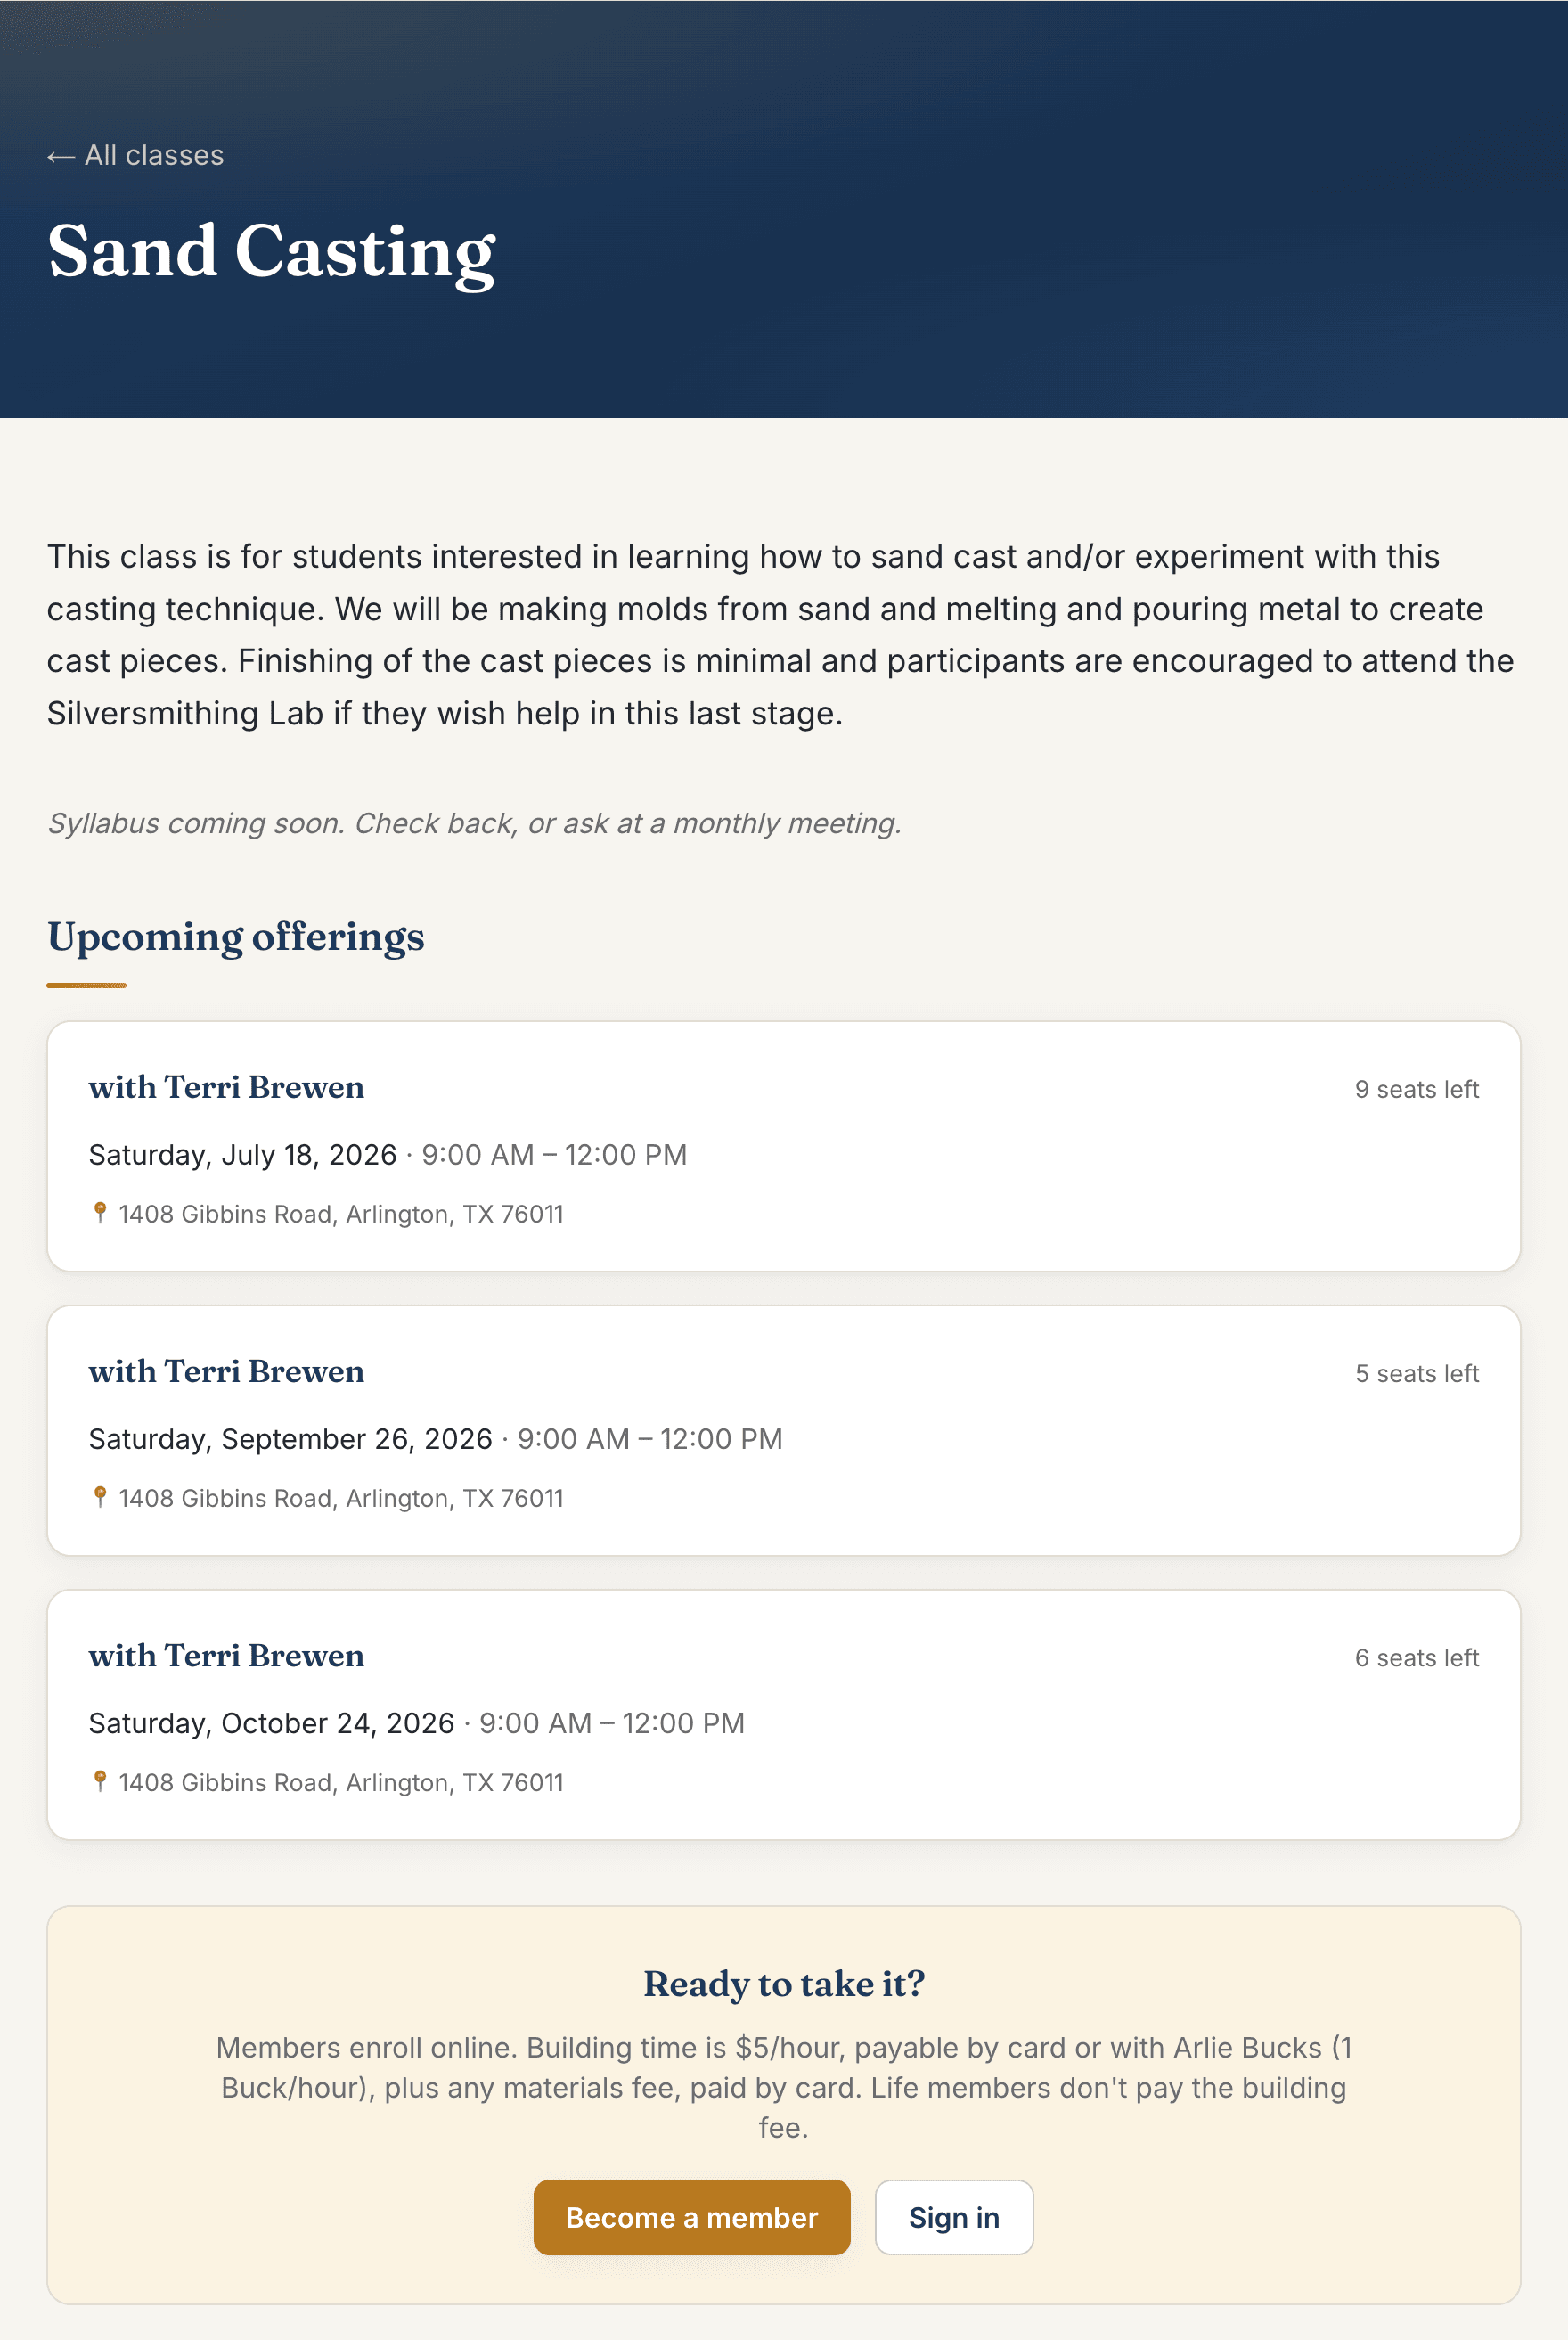
Select a class to read what it covers, its syllabus when the instructor has posted one, and the Upcoming offerings: each date with its instructor, time, location and the number of seats left.
If you are not signed in, the page ends with Ready to take it? Select Sign in there to continue.
Step 3: Sign in and open Learning
Once you are signed in, select Learning in the top bar, then Browse & enroll. This is the member version of the class list: the same classes, plus a Recommended for you row matched to the interests on your Membership page, and a badge on any class someone in your household is already in.
Select the class and date you want.
Step 4: Read the class page
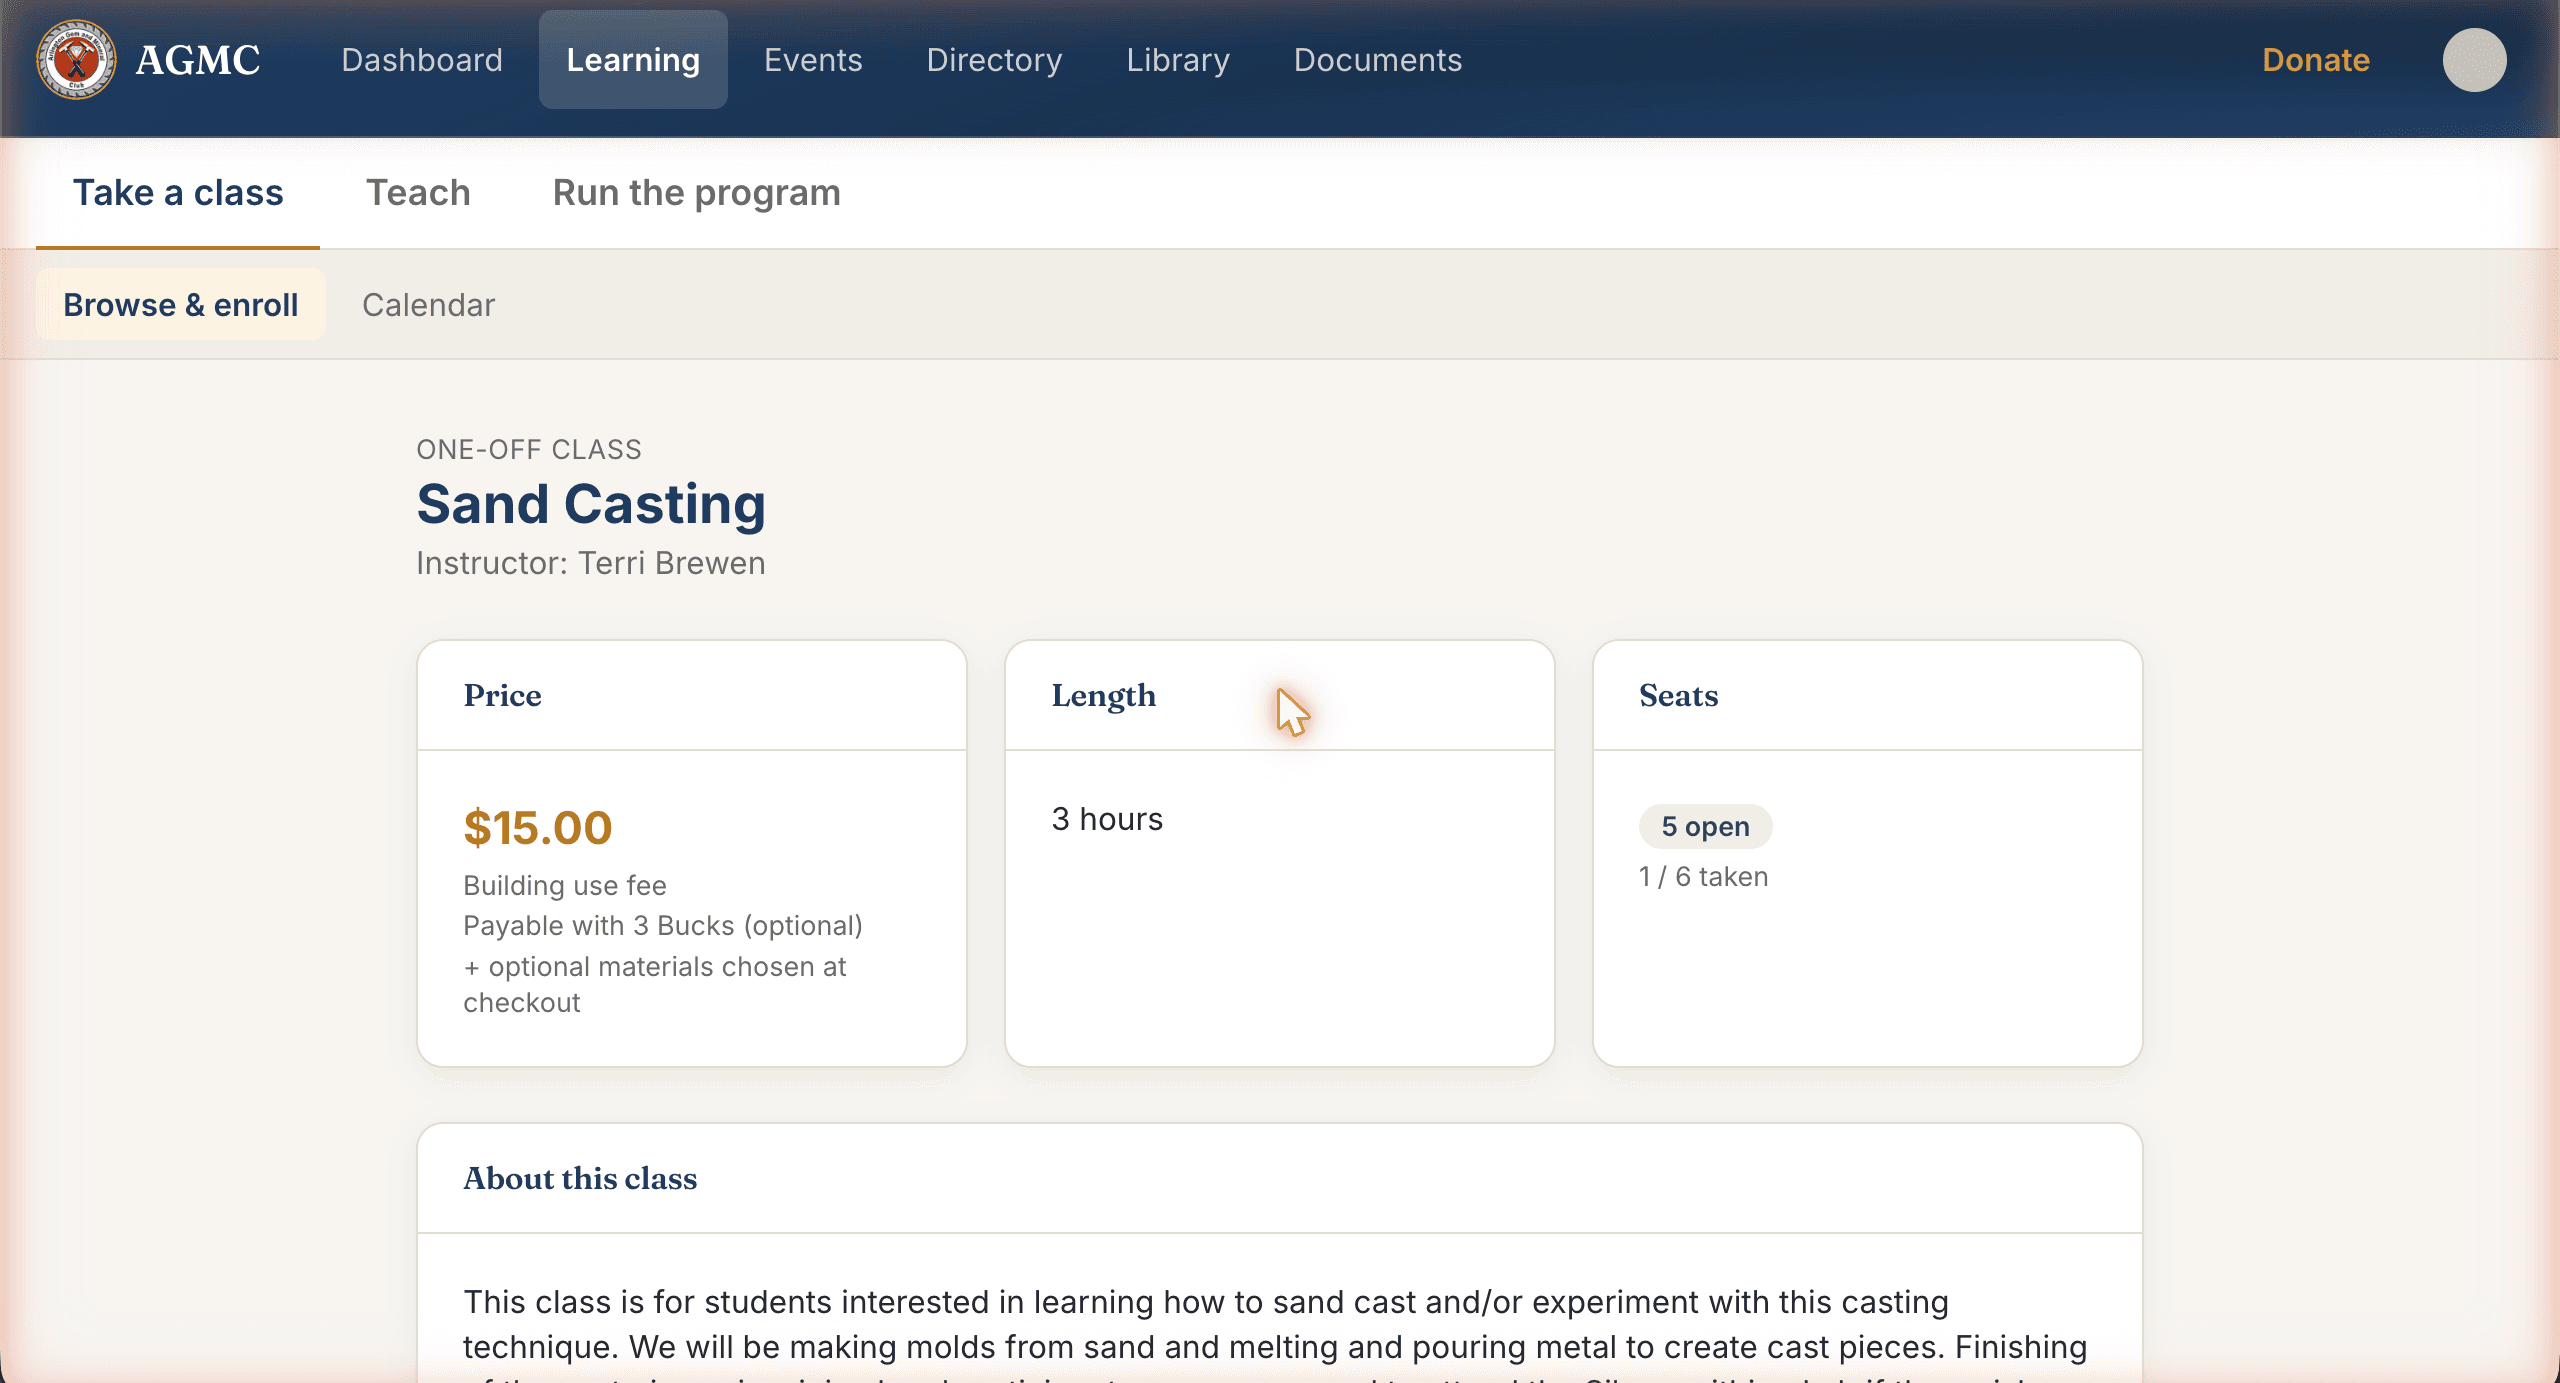
The class page shows Price, Length and Seats at the top, then About this class, Materials, Tools, any Prerequisites, the Schedule, and finally the Enroll box. The price card spells out the building fee, whether Bucks can cover it, and what you choose at checkout.
Materials lists what is Charged when you sign up and, separately, anything Bought in class: extras such as a second casting flask or big saw time, which you pay the instructor for in class if you need them. Tools groups what to bring; a section marked bring them if you have them means the club can lend you one.
Prerequisites lists the classes you need first. Two classes joined by or means either one is enough. Before you come is advice about what helps to know already; it never stops you signing up.
Step 5: Took the prerequisite somewhere else? Ask for a sign-off
If a prerequisite stops you, the Enroll box lists it with I'm experienced: ask for a sign-off. Select it, say where you learned the skill (another club, years of practice, a class elsewhere), and send. The class's instructors and the department chair get your note by email.
When one of them approves, the prerequisite goes on your record and you can sign up for this class, and any other class that needs it. You get an email either way. Until then the class page shows Sign-off requested.
Step 6: Choose who the seat is for
In the Enroll box, the first choice is who is taking the class: Myself, or another adult or junior in your household. Each person is checked separately for age rules and prerequisites, and the box tells you when someone is already enrolled or on the waitlist.
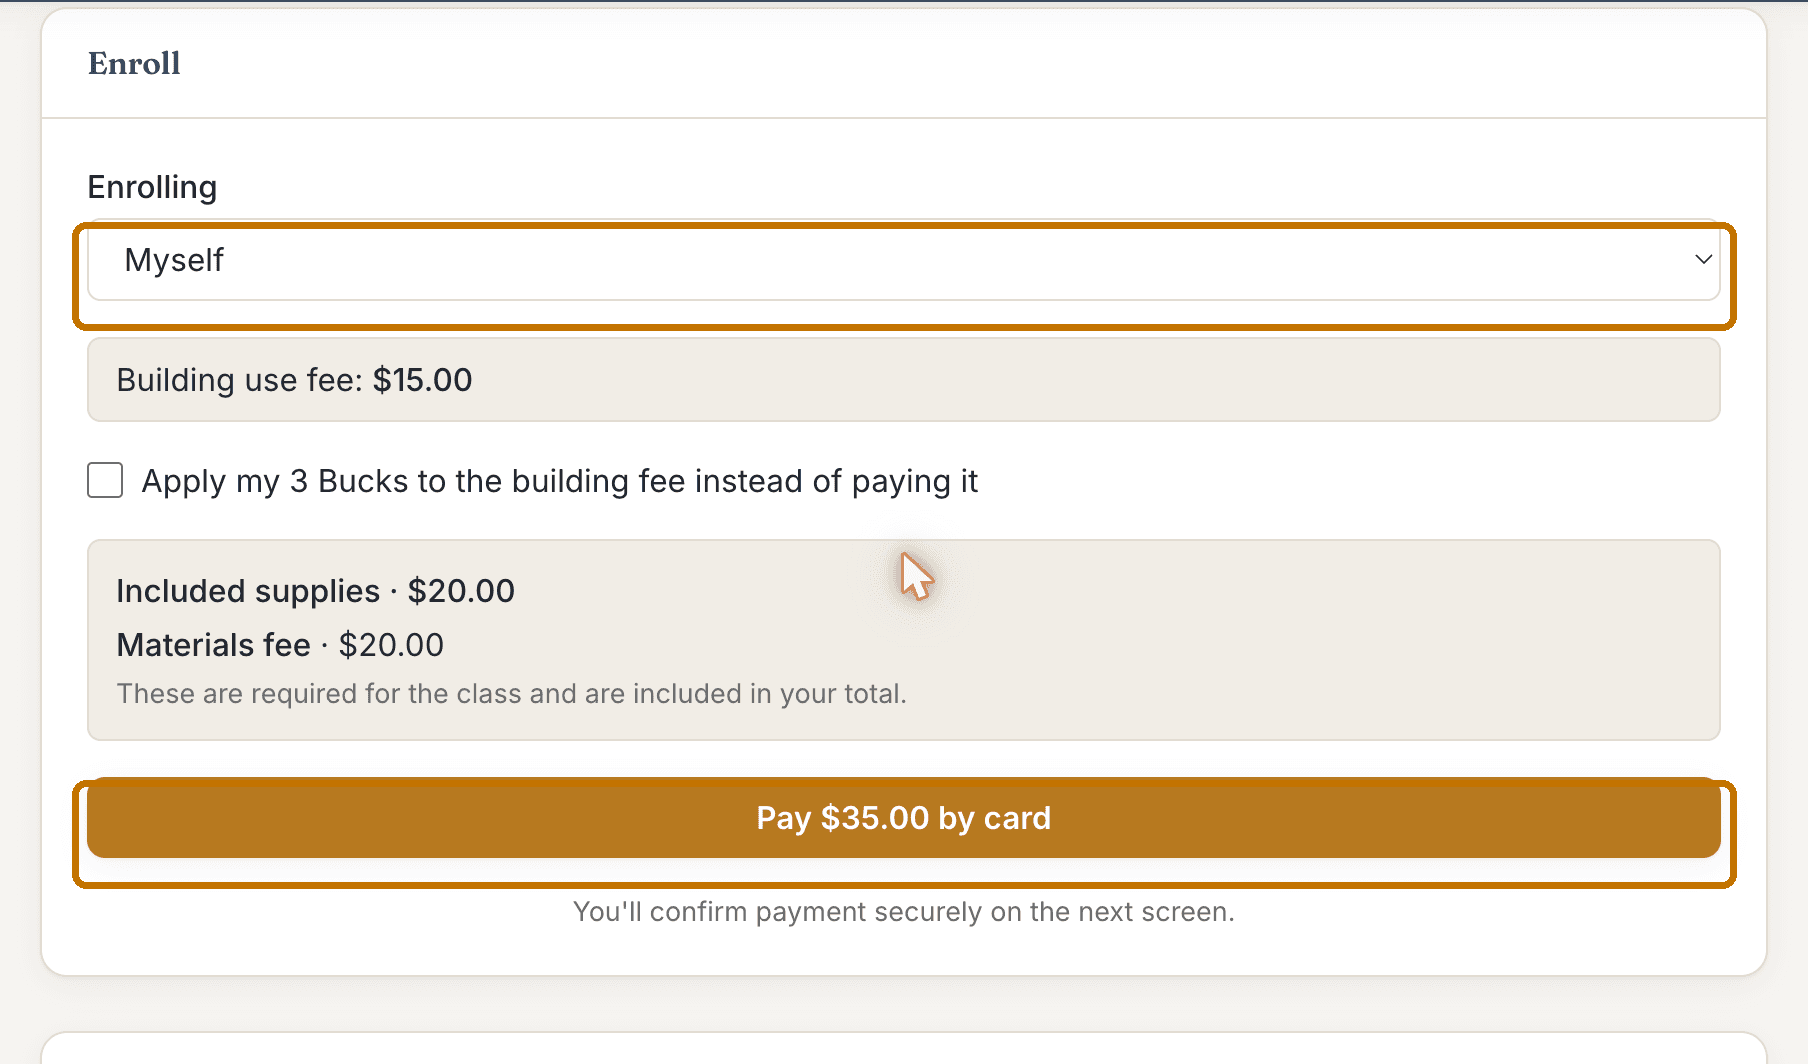
Scroll down the class page to find the Enroll box. The drop-down and the pay button are circled. Step 7: Pick your supplies and tools
Included supplies are part of the class and already in your total. Optional extras are yours to tick or leave. Some classes have a menu, such as Project or Ornament kit: choose one of the options, and the button will not go on until you do.
If the class offers a Tools for this class choice, you have to pick one: rent the club's kit (a deposit is charged now and refunded to your card when the instructor checks the kit back in), buy your own set to keep, or bring your own.
Items listed as Bought in class are not part of checkout. Pay the instructor for them on the day, by cash or card, if you need them.
Step 8: Pay for the seat
The button spells out what you will pay, for example Pay $15.00 by card. Tick Apply my Arlie Bucks to the building fee to spend Bucks instead; any materials or tools stay on the card, and the button changes to match. A class that takes card only says This class doesn't take Arlie Bucks on its price card. A class with nothing to pay says Enroll (no charge) and takes the seat straight away.
Card payments go through the same secure Stripe page as membership. When Stripe sends you back, the seat is yours and a confirmation email is on its way.
Step 9: Full class? Join the waitlist
When every seat is taken, the Enroll box says This class is full with a Join waitlist button. When a seat opens, the club emails you, and a green A seat opened up! banner appears on your dashboard and on the class page with a button to take it. Offers hold the seat for you for a limited time, so keep an eye on your email.
Step 10: Check your dashboard, and change your plans if you need to
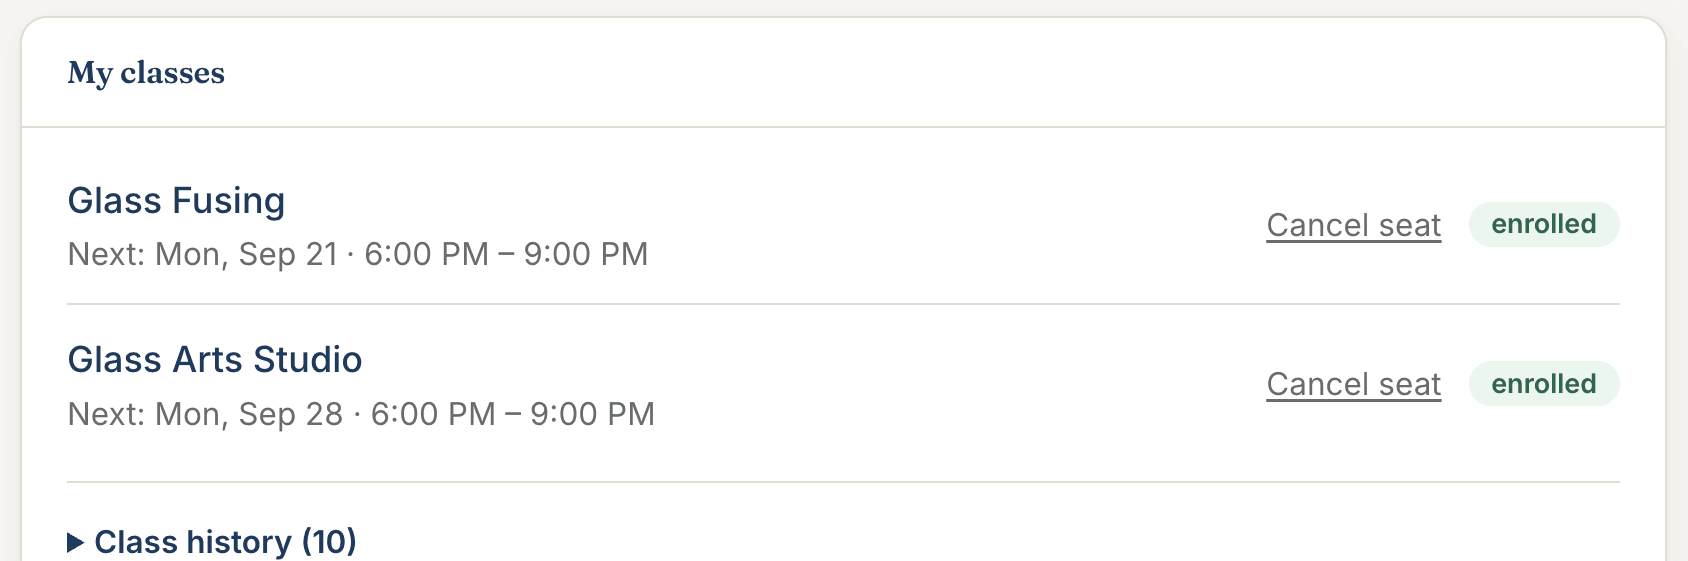
My classes on your dashboard lists every seat in your household, with its next date and time. Select a class to go back to its page.
Plans change. Cancel seat on the dashboard, or Cancel on the class page, at least 48 hours before the first meeting refunds the whole charge; closer than that, the fee is not refundable. Move to another date on the class page switches your seat to another open date of the same class at no charge, up to the same 48-hour cutoff. Inside the cutoff, the department chair can still move it for you.
Need a hand?
Email support@agmc57.club and mention this guide and the step you were on. Nothing you do on the site is permanent: an officer can fix any record, refund any charge, and move any seat.